Godot 2D Game Tilting Platforms Tutorial (With Code!)
In this tutorial, I aim to show you how to quickly create a rather common feature in platforming games - A platform that will tilt when interacted with by a player. This tutorial is for use with 2d games made using the Godot engine.
After this tutorial you will be able to add them to your own game project and reuse this method for not just platforms, but indeed any 2d node you want to, including tile maps!
Specifically, this deals with such a platform purely kinematically. That is to say, without using any rigidbodies. All in less than 30 lines of code!
Although a rigidbody is a very intuitive thing to reach out to in this situation, if your character controller uses a CharacterBody2D node, as this tutorial will assume, the forces must be applied progmatically, and this might not always be ideal. For example, when you wish for a platform which already uses kinematic movement, you may wish for it to continue to be controlled kinematically. Or you wish to decorate an existing node (Such as a TileMapLayer or even a StaticBody2D) with behaviour as to emulate pushing arond a pivot, rather than recreating it entirely.
Personally, I find rigidbodies in Godot a little harder to work with than in say Unity. There is no straightforward way to lock a rigidbody’s rotation or axis in Godot. For this reason, while not strictly necissary, I tend to lock myself in to using either purely kinematic or physics-based movement controllers for my functional gameplay elements.
Prerequisites
Before we beign, there are some assumptions I will be making
- You know how to make basic levels composed of static platform bodies (i.e. Something your player can actually walk on)
- You know how to create a basic player character body 2D controller (i.e Moving left/right, jumping, and applying gravity)
That’s all you need! With that, let’s begin!
Getting things ready
Let’s get ready to create a platform by first creating a simple space for our player to move around in.
For our purposes, I have added a simple player using CharacterBody2D that supports the prerequisites outlined above.
This is Bob. I have placed him into Bob’s house.
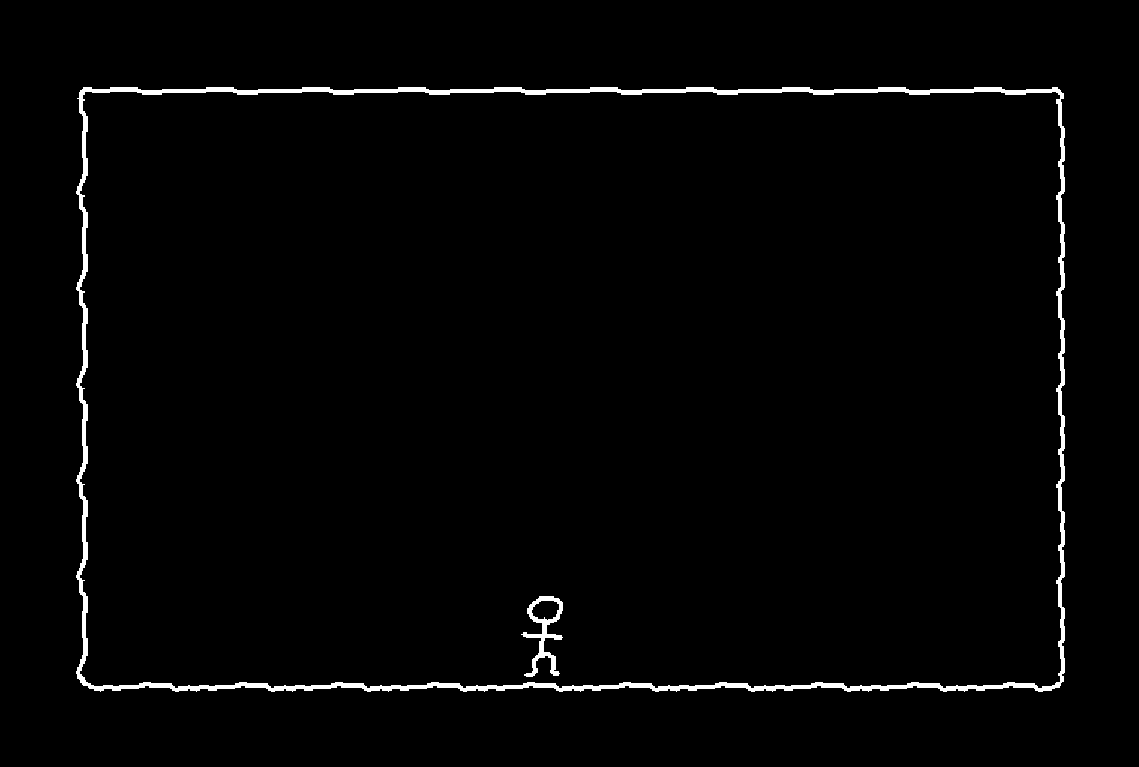 Hi, bob!
 Bob’s house is a little bland. He wants to buy some sick furniture. To begin with. He has a little bit of an eclectic taste, so he wants a seesaw in his house.
Let’s add the seesaw. I am going to use this sprite here for the seesaw itself.

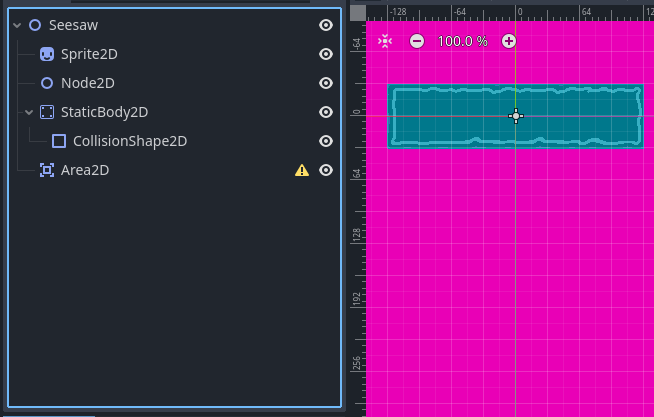
With this, let’s add a new empty scene containing a Node2D. Rename this empty node to “Seesaw”, and add the following child nodes.
- Sprite2D
- Node2D
- StaticBody2D
-
- A CollisionShape2D, which matches the shape of the seesaw platform
- Area2D (Let’s leave it without a CollisionShape2D for now)
Your node tree for the seesaw should now look something like this
We should rename our nodes so we know what is what.
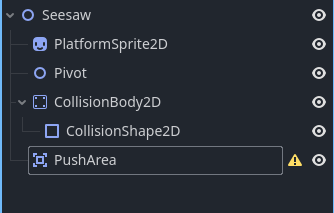
Fantastic. Maybe you can guess what that Area2D is going to be for now? It will be used as a margin to detect when the player is collding with the platform, in order to trigger platform rotation.
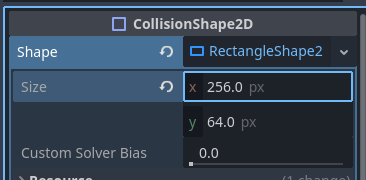
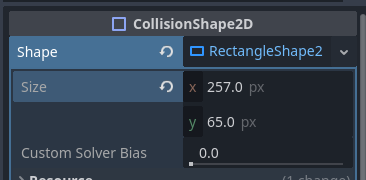
Let’s add that now - for a square, simply make the CollisionShape2D’s shape area 1 pixel larger and taller than the shape used by your StaticBody2D’s CollisionShape.
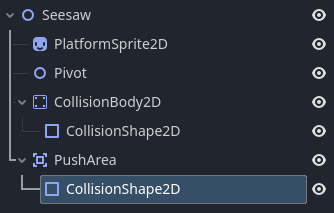
That’s all there is to setting up our scene for the seesaw. Let’s look at the code next.
GDScript Code
The code here is provided in GDScript.
class_name Seesaw;
extends Node2D

@export var rotation_sensitivity = 0.1;
@export var rotation_slowdown_ratio: float = 1;
@export var pivot: Node2D;
@export var overlap_area: Area2D;
var _rotation_speed = 0;

func _physics_process(delta: float) -> void:
	var is_colliding = false;
	for body in overlap_area.get_overlapping_bodies():
		is_colliding = true;
		var pivot_point: Vector2 = pivot.global_position;
		var body_local_to_pivot: Vector2 = body.global_position - pivot_point;
		var body_local_to_rotated_pivot = body_local_to_pivot.rotated(
			-rotation
		);
		var rotation_direction_sign: int = -sign(
			body_local_to_rotated_pivot.x *
			body_local_to_rotated_pivot.y
		);
		if rotation_direction_sign != 0:
			_rotation_speed = rotation_direction_sign * body_local_to_pivot.length() * rotation_sensitivity
		else:
			_rotation_speed = body_local_to_pivot.length() * rotation_sensitivity;
	if !is_colliding:
		_rotation_speed *= (1 - rotation_slowdown_ratio * delta);
	rotation_degrees += _rotation_speed * delta;
As promised, it’s a small script! But let’s break it down a little bit.
@export var rotation_sensitivity = 0.1;
@export var rotation_slowdown_ratio: float = 1;
@onready var pivot: Node2D = $Pivot;
@onready var overlap_area: Area2D = $PushArea;
var _rotation_speed = 0;rotation_sensitivitysimply controls how fast the rotation will be. The higher this value, the faster the rotation will be.rotation_slowdown_ratiois the rate of slowdown. The higher the value, the faster the platform will stop rotating. A value of1means it will take 1 second to stop entirely.2means half a second and so on.
The next two variables are simply references to the nodes in our scene for use later.
_rotation_speed simply tracks the current rate of rotation.
Now let’s examine the _physics_process function.
var is_colliding = false;
for body in overlap_area.get_overlapping_bodies():
    is_colliding = true;
    # ..snip..
if !is_colliding:
    _rotation_speed *= (1 - rotation_slowdown_ratio * delta);
As you can see, this snippet simply tests for overlapping bodies based on the mask of our Area2D node. If so it sets the simple flag, is_collding. If the flag is not ever triggered, then we simply reduce the current rotation speed of the platform.
var pivot_point: Vector2 = pivot.global_position;
var body_local_to_pivot: Vector2 = body.global_position - pivot_point;
var body_local_to_rotated_pivot = body_local_to_pivot.rotated(
    -rotation
);
Let’s consider what this is doing exactly.
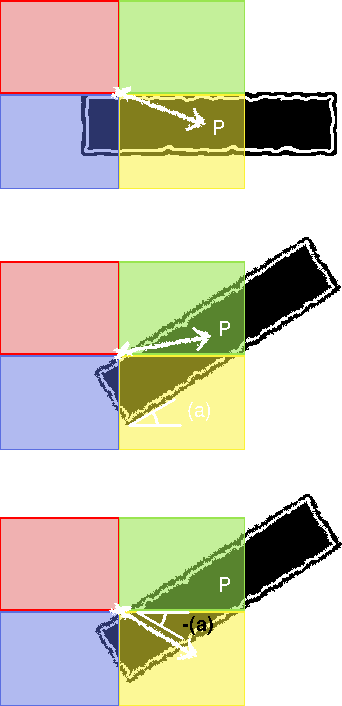
Observe the vector X->P
Notice it lands in the yellow quadrant, resulting in a counter-clockwise rotation
Once rotated, the resultant quadrant of the vector X->P also changes
In order to maintain rotation in the appropriate direction, we rotate vector X->P by the angle -(a)
Thus the vector points once more to the appropriate quadrant regardless of platform rotation
The basic idea is that the direction of the vector from the body which collides with the platform to the platform’s pivot, either rotates the seesaw either clockwise (Green, Blue) or counter-clockwise (Red, Yellow).
If we simply checked if the colliding body (Or to be precise in our case here, the overlaping body) relative to the pivot’s x/y signs directly, we would have an issue when the body passed from any quadrent into another, i.e. red into blue, or blue into yellow. The rotation would suddenly be applied in the wrong direction!
So we must first translate the point relative to pivot by the currentn rotation of the platform. By doing so, the relative position to the pivot is translated to the appropriate quadrent for clockwise or counter-clockwise rotation.
var rotation_direction_sign: int = -sign(
    body_local_to_rotated_pivot.x *
    body_local_to_rotated_pivot.y
);
if rotation_direction_sign != 0:
    _rotation_speed = rotation_direction_sign * body_local_to_pivot.length() * rotation_sensitivity
else:
    _rotation_speed = body_local_to_pivot.length() * rotation_sensitivity;
Now we simply muliply our translated vector’s x and y components and find the sign. This tells us if the rotation is ultimately clockwise or counterclockwise. We could check the signs individually for each quadrent if we wished but this is a lot nicer.
Finally we apply the rotation by the magnitude of the vector from the pivot. This causes the platform to rotate faster the further away from the pivot the body is. We also add a tiny amount of rotation for the edge case when the sign is neither positive or negative (zero).
Result
Place the seesaw into bob’s house, and he can now play on his new toy to his heart’s content!
I hope you enjoyed this very breif tutorial as much as I did writing it and you find it helpful! This implementation is compatible with all kinematic bodys, and indeed with any Node2D. You could replace the body here with a TileMapLayer and create very interesting platform shapes if you wish. Good luck with all your Godot endevourvs and check out my other projects on this site or my github account!